
Ultimate 4-Day Banff Itinerary for First-Time Visitors (2024)

With its snow-capped mountains, pristine turquoise glacial lakes, and countless hiking trails, Banff is arguably the most heart-stoppingly beautiful national park in Canada. Whether you are looking to escape the chaos of the world and retreat to nature or simply admire the natural beauty, Banff is a place that everyone visiting Canada should visit. If you are only in town for a few days, here is my ultimate 4-Day Banff Itinerary for First-Time Visitors.
Traveling Soon? Here Are the Travel Resources I Use!
🏡 Accommodations: I use Expedia or Booking for hotels and Hostelworld for hostels
✈️ Flights: I find the best deals on StudentUniverse & Skyscanner
🗺️ Travel Insurance: I suggest Safetywing as an affordable option
🤿 Tours & Experiences: I love to use Viator and Get Your Guide
🚗 Car Rentals: I recommend DiscoverCars for all your rental car needs!
📱 E-Sim: The company I’ve had the most positive experiences with is Airalo
Use code ‘KRISTI7012’ for an extra $3 off your ESIM from Airalo!
Where Is Banff National Park?
Banff National Park is nestled in the Canadian Rockies Mountains in Canada’s Alberta Province. The country’s iconic natural beauty is easily accessible by taking the Trans-Canada Highway (Hwy 1), which as the name suggests, is a highway that stretches across all of Canada. But, if you’re more familiar with some of Canada’s major cities, Banff National Park is a 1.5-hour drive from Calgary, about 9 hours Northeast of Vancouver, and 35 hours Northwest of Toronto.
Fun Fact: The United Nations named Banff National Park a World Heritage Site in 1985.
How to Get to Banff Canada
To get to Banff National Park, you have a few options. The first and obvious option is to drive to Banff from wherever you live if you are up for a road trip and live within reasonable driving distance.
By Train
Another option is to take the Canada Rail, which is a train that tours across all of Canada, stopping at several scenic destinations. This is great if you want to spend a week or more sightseeing all over Canada and are looking to travel with ease. However, with tickets costing thousands of dollars per person, it’s arguably the most expensive option.
Where to Fly for Banff
For anyone who lives further outside of Canada, you will likely need to hop on a plane. Since there is no airport in Banff, Canada, the closest airport you can fly to is the Calgary International Airport (YYC). As some who has flown through Calgary’s airport multiple times, I’m a big fan. It’s easy to navigate, check-in and security are efficient, and you don’t often feel the chaos that larger airports typically have.
✈️ PRO TIP: For finding the cheapest flights, I suggest looking at both Skyscanner and Student Universe.
Calgary Canada to Banff
From the airport, I highly recommend renting a car. This will provide you with the most flexibility and freedom for exploring all the magnificent places around Banff. And, as mentioned previously, the drive time from Calgary to Banff is usually quick 1.5 hours since the distance between the two cities is about 140km. This also means you can easily spend a day exploring Calgary and then drive out to Banff in the evening!
However, if you aren’t up for renting a car, there are tons of transportation services and private tours from Calgary to Banff. For example, this private tour provides tons of flexibility, includes hotel pick-up, and allows you to comfortably explore Banff National Park completely hassle-free! A private tour is especially the route to go if you want to maximize a short amount of time as your guide will know all the best spots.
✅ Check rates & availability for this highly-rated PRIVATE tour of Banff National Park!
Entrance Fee for Banff National Park
If you visit independently, you’ll need puy a park pass to visit Banff National Park. Fortunately, the pass includes entrance to Banff, Jasper, Kootenay, Yoho, Mount Revelstoke, Glacier, Waterton Lakes, and Elk Island national parks. Yay! — I know these little fees can be annoying to some, but the money generated goes strictly back into the upkeeping of the park and all the services it provides. Park passes can be bought online and are good until 4 pm the next day.
If you intend to spend more than a few days in Banff or visit other Canadian national parks within a year, I would look into a Parks Canada Discovery Pass. This is the most cost-effective option as the Discovery Pass is good for a year and grants entrance to all 100+ national parks in Canada, national marine conservation areas, and national historic sites across Canada. Discovery passes must be bought online and mailed to you.
4-Day Banff Itinerary
Now that you know how to get to Banff and some general background info, it’s time to discuss all the amazing things that you can do during your 4 days in Banff. And, since I know it’s an absolute pain when you’re researching destinations and people just list all the activities in a random order that has you crisscrossing all over the city, I have everything listed in the exact order I recommend doing them. This will hopefully save you both time and energy!
Day 1: 4-Day Banff Itinerary
For Day 1 of my 4-Day Banff itinerary, I recommend some light hiking to get yourself adjusted to your surroundings. After getting your heart rate up, you can relax by the side of one of Banff’s best lakes before heading back into town.
1. Johnston Canyon
I recommend waking yourself up with an easy hike at Banff’s Johnston Canyon. I must warn you, the hike is extremely popular because it’s a well-maintained trail. Thus, you can expect there to be lots of foot traffic, especially if you arrive mid-morning or afternoon. But, as you pass through the limestone canyon, there are three main sites along the trail: the Lower Falls, the Upper Falls, and Ink Pots.
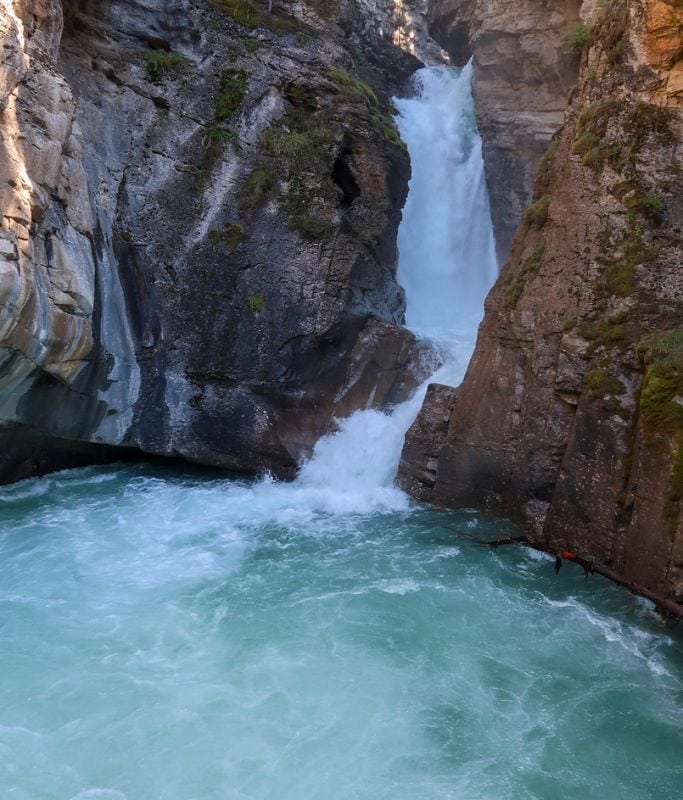
Lower Falls
The Lower Falls are 1.2 km (0.75 miles) away from the trailhead and feature a medium-sized glacial blue waterfall. If you don’t mind waiting, you can pass through a small cave that allows you to view the waterfall a few feet away. However, if you only want a picture with the waterfall in the background, the closer viewpoint isn’t worth it as it will just soak your camera.
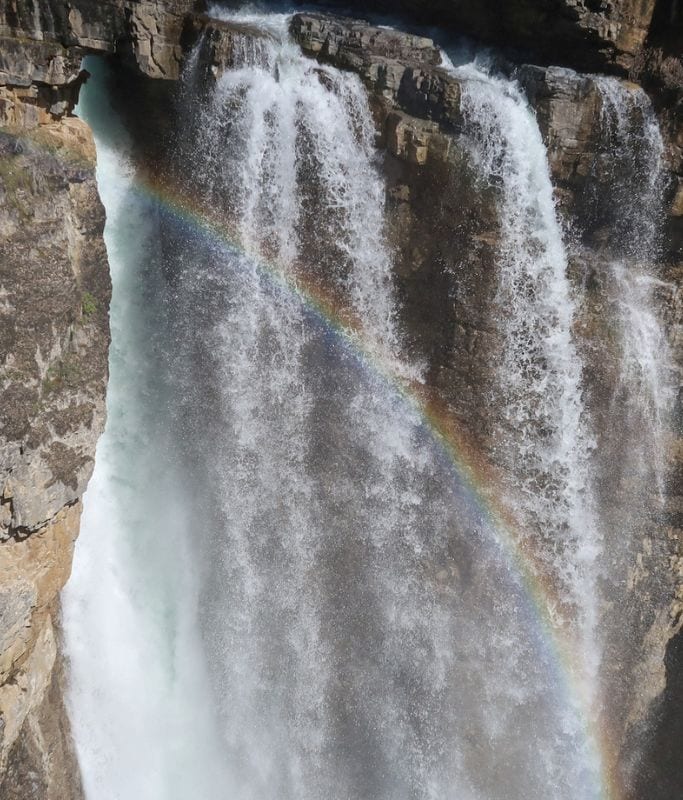
Upper Falls
After Lower Falls, you can continue hiking for another 1.3km to reach the Upper Falls. Beware, you will have to climb relatively steep and uneven steps, so wear good shoes. That said, I saw multiple people with baby strollers heading to the Upper Falls, so anything is possible if you believe it… 😂 The Upper Falls has a larger waterfall and is where lots of people go for the Instagram shot. It’s genuinely stunning, and you start to feel like you’re in some enchanted forest once the rainbows start appearing!
Ink Pots
If you enjoy hiking and have the energy, continue another 2.1km to Ink Pots. The crowds definitely thin out here and you might see some wildlife on the trail, so be on the lookout. At Ink Pots, you will see 5 mineral pools that are varying shades of blue-green in a large meadow.
🥾 PRO TIP: Get to Johnston by 7:30 am to avoid insane crowds. This will also help you secure a spot in the closer parking lot.
2. Lake Minnewanka
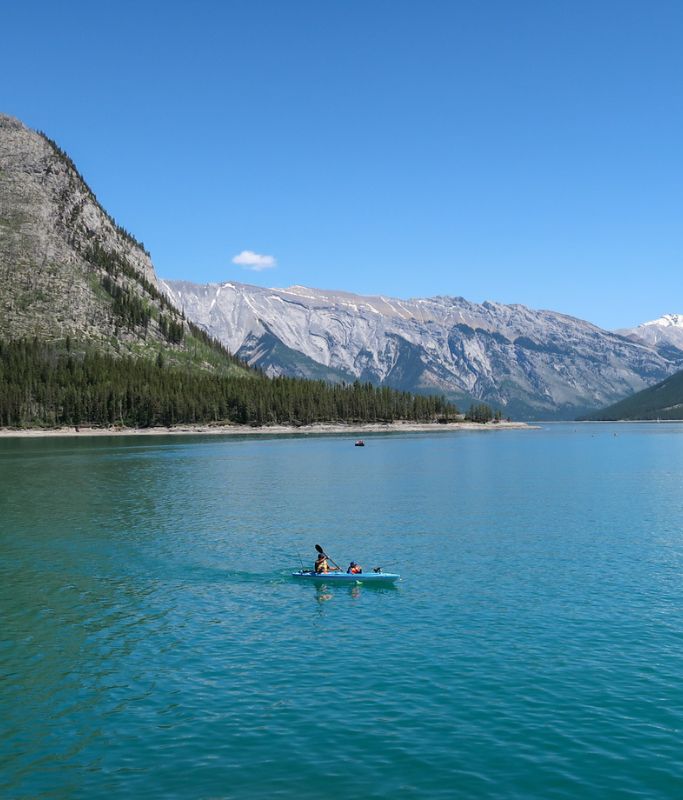
After a hopefully pleasant hike at Johnston Canyon, head over to Lake Minnewanka to relax and have a picnic. This glacial lake is huge and great for canoeing or taking a boat cruise around. The surrounding forest area is also filled with all kinds of hiking and biking trails. If you’re brave and have a high cold water tolerance, you can even go for a swim.
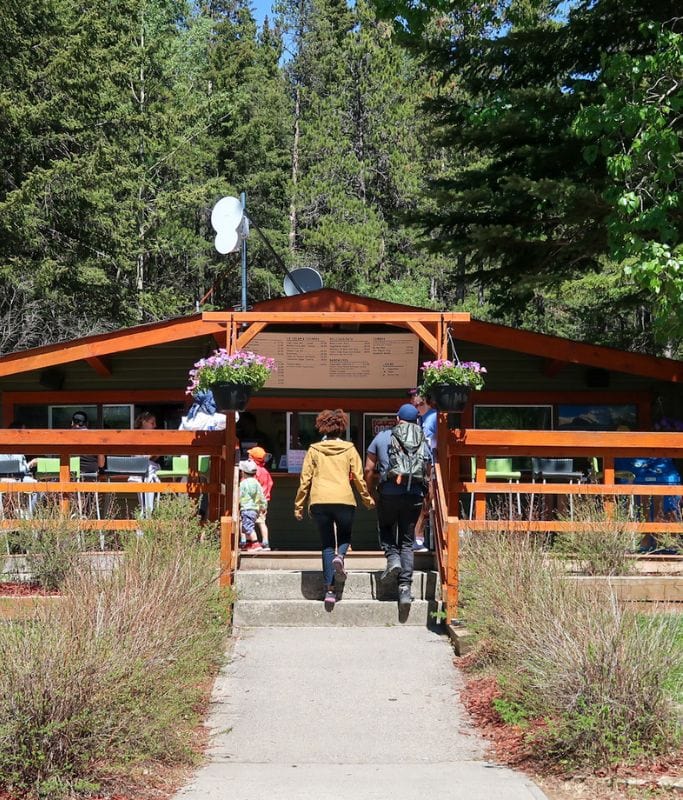
This was one of my favorite places in Banff National Park to chill. While I was there, I observed the wildlife, dipped my toes into the water, and enjoyed the astonishing views. Oh, and should you get hungry, there’s a little snack shop called the Black Anchor, but the prices are pretty overpriced.
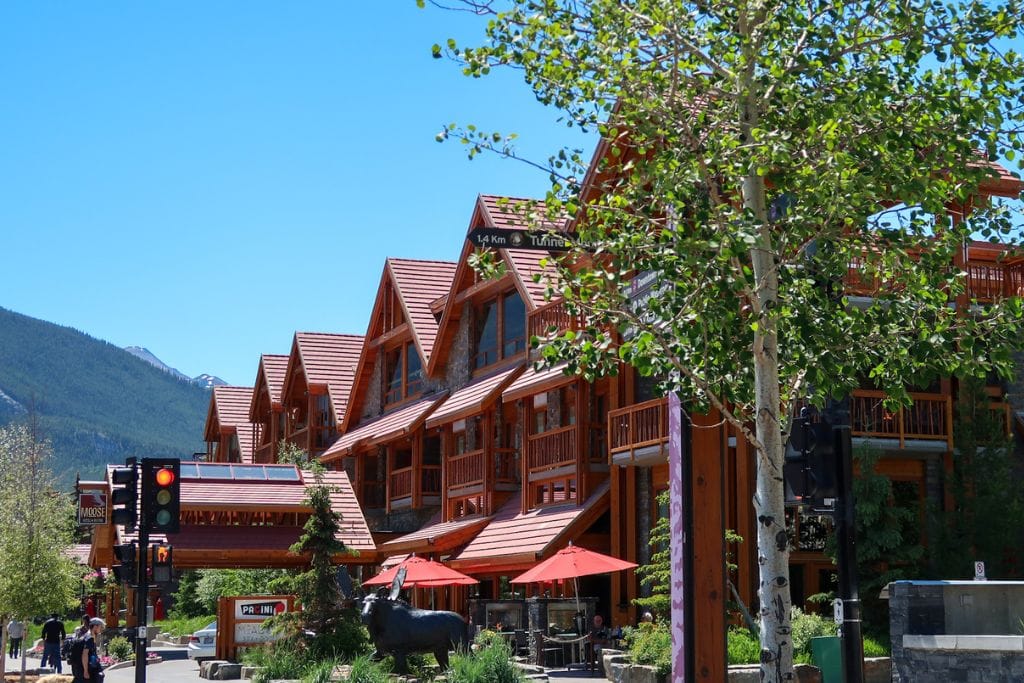
3. Banff Town
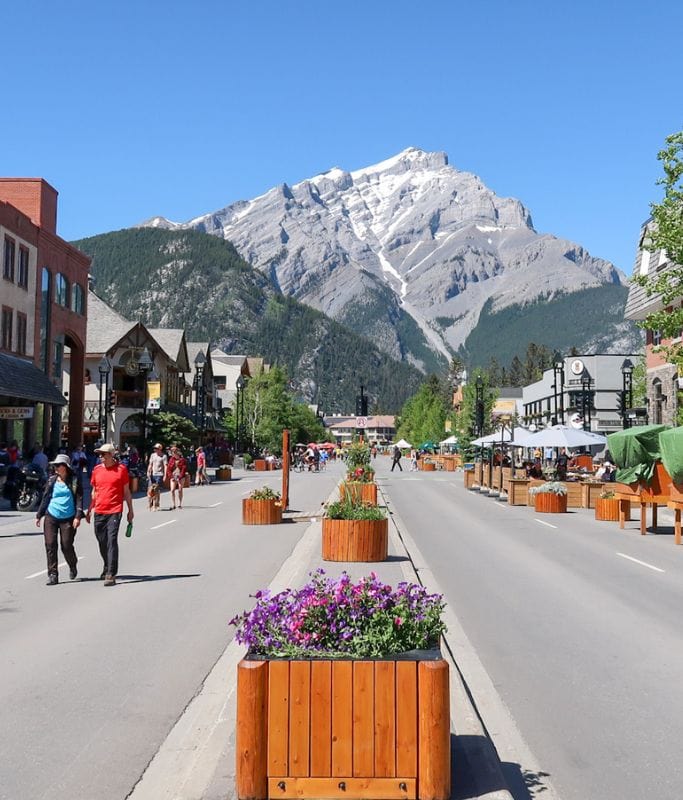
When you are ready for a change of scenery and perhaps some food, head 5km to Banff, the famous resort town. Banff town undoubtedly knows its target consumer. Here, you’ll find the streets lined with restaurants and bars serving different types of cuisine. There’s also no shortage of souvenir shops, coffee shops, and various types of housing accommodations.
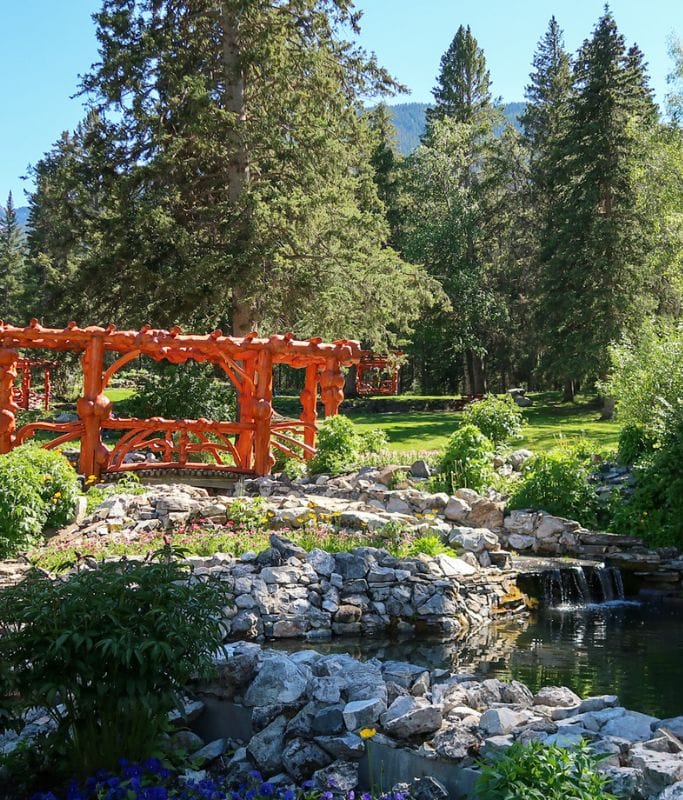
In one direction, the main street, Banff Avenue, gives way to a striking view of Mount Norquay. Meanwhile, the other end of the street looks at the Banff National Park Administration Building. I know “administration building” doesn’t sound thrilling, but it offers great views down Banff Avenue. Furthermore, if you get tired, you can sit on one of the many benches in the Cascade of Time Garden. This garden is also just pleasant to stroll around and get lost in your thoughts.
4. Bow Falls Viewpoint
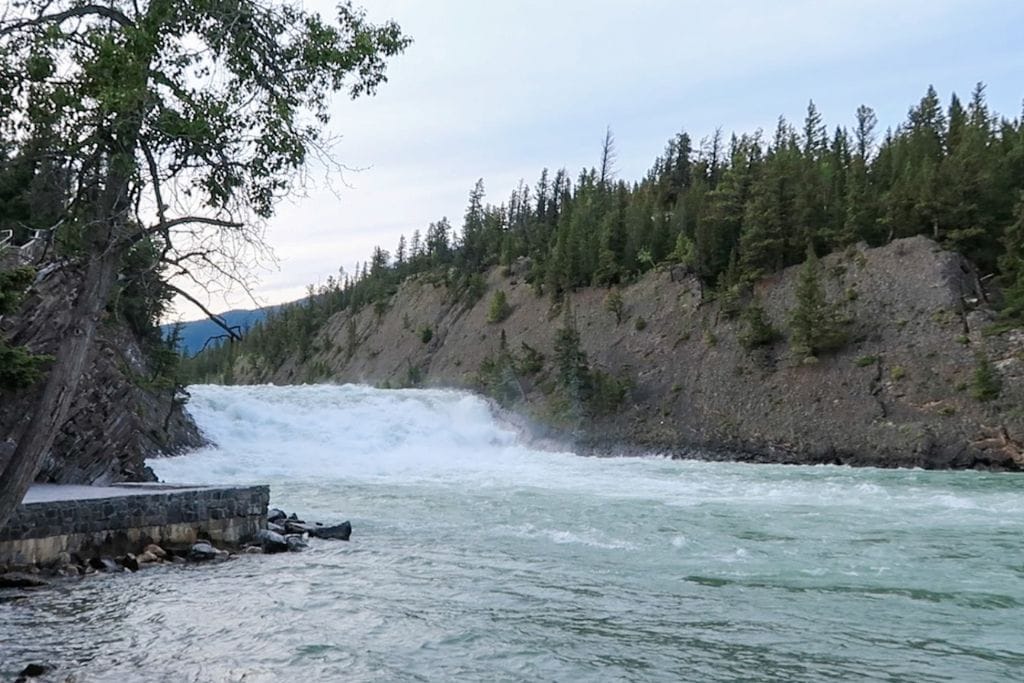
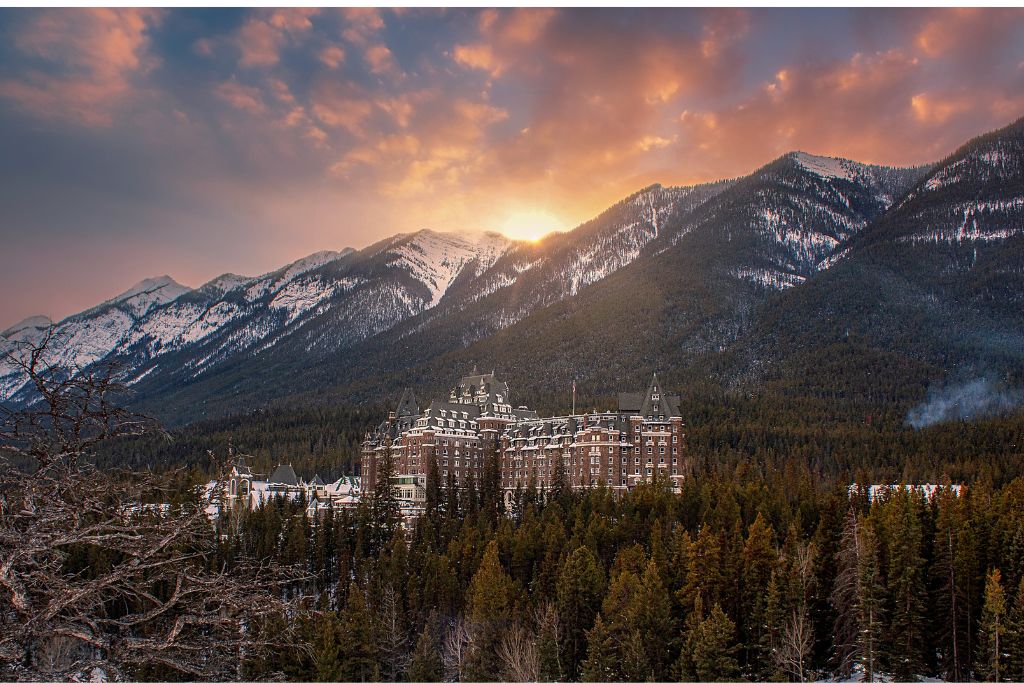
A short drive or 20-minute walk from Banff Avenue is Bow Falls Viewpoint. This scenic spot showcases the small but wide Bow Falls waterfall. As you admire the surroundings, you might notice the giant Fairmont Banff Springs Hotel. The luxury hotel costs over $800+ per night, so if you can’t afford to stay there like me, at least you can admire it from the outside! Aside from the waterfall and lavish hotel, the area is home to various hiking and cycling trails that don’t get too much foot traffic. Therefore, if you hate crowds and aren’t a morning person, this is a nice alternative to the trails at Johnston Canyon.
Day 2: 4-Day Banff Itinerary
For day 2 of my 4-Day Banff Itinerary, it’s time to see Lake Louise and Moraine Lake. These two lakes are the two most popular attractions that millions of visitors come to Banff National Park each year to enjoy.
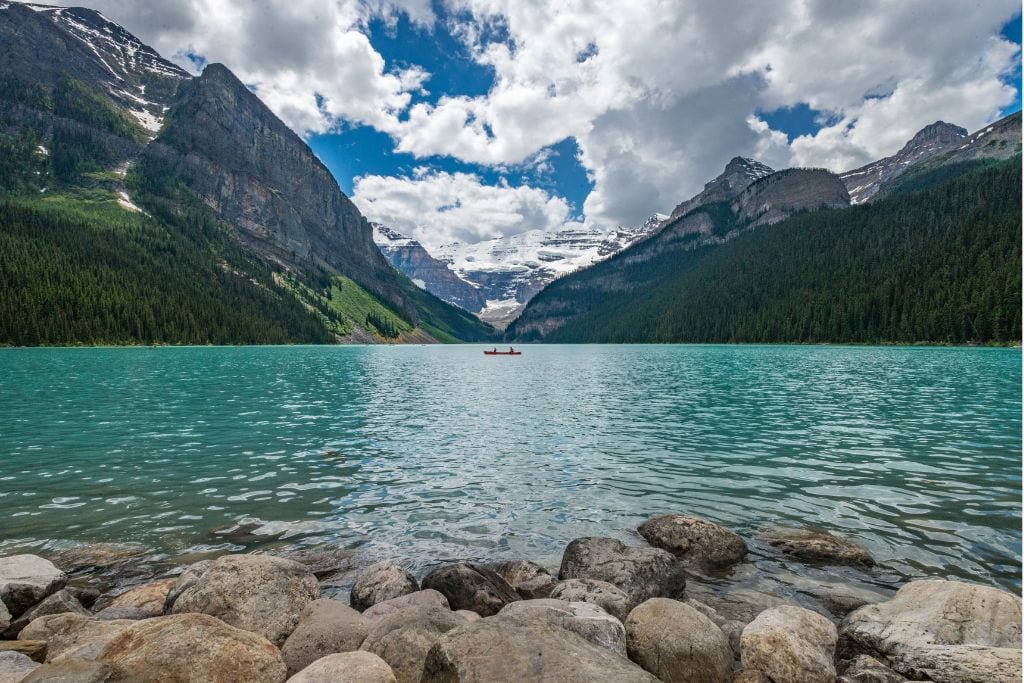
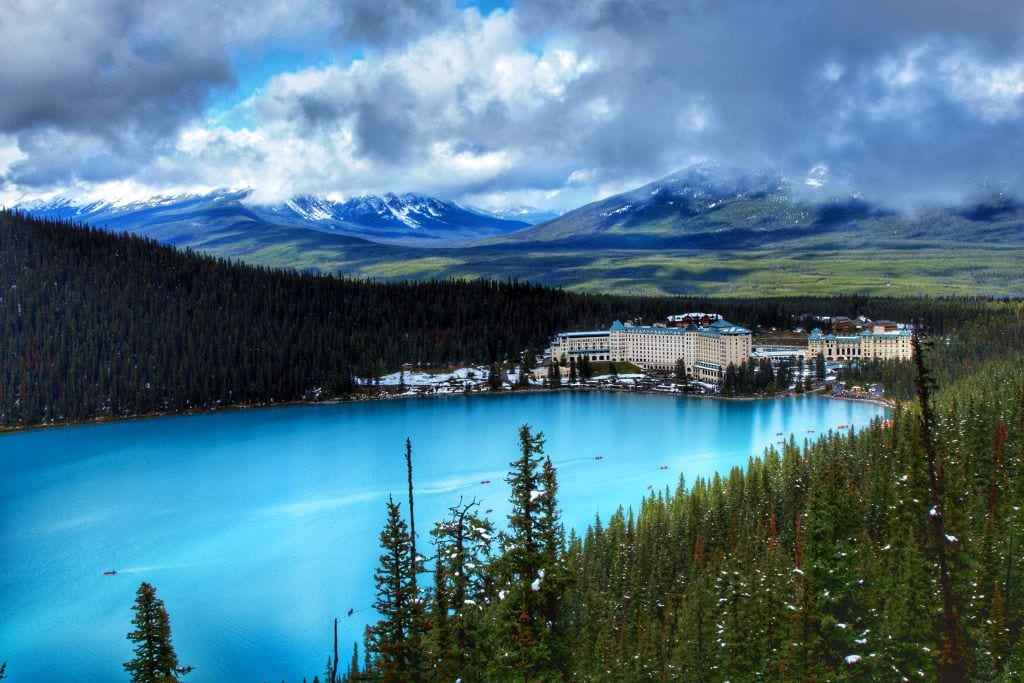
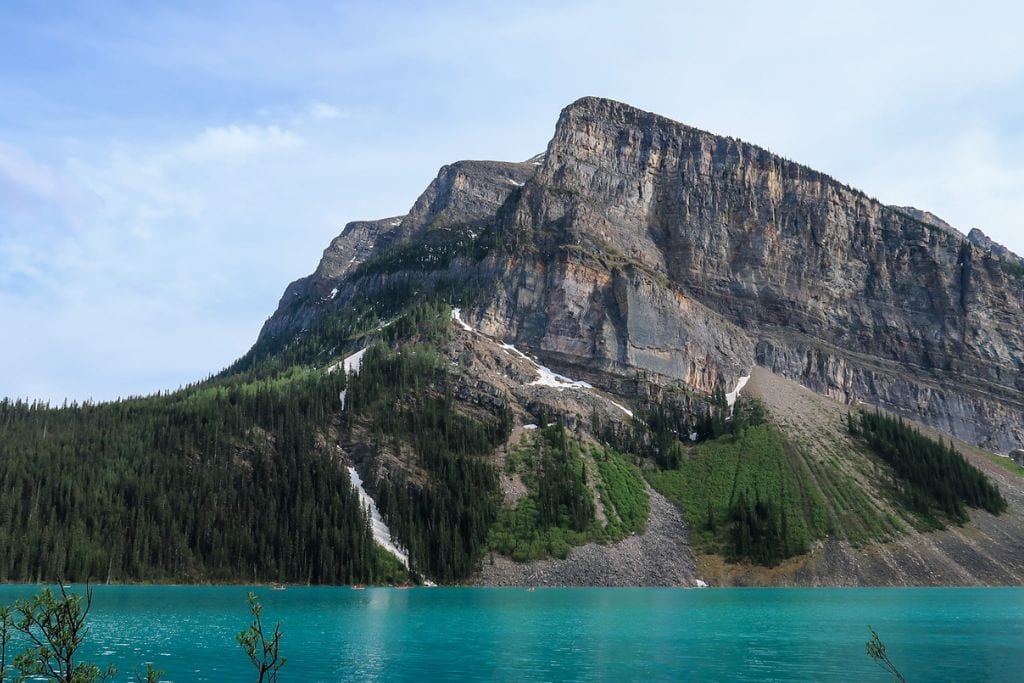
5. Lake Louise
Getting to Lake Louise
I recommend visiting Lake Louise first thing in the morning to avoid having to deal with the afternoon crowds. To get to Lake Louise, there are two budget-friendly options.
- Option 1: If you have a rental car, you can wake up before the sun rises and try to obtain one of the coveted parking spots. These spots cost $12.75 CAD for the day and the lot typically fills by 7 AM. Getting to the lake at 6 AM is the best way to ensure you get your perfect photograph.
- Option 2: You can drive to the Lake Louise Ski Resort and ride the Parks Canada Shuttle to both Lake Louise and Moraine Lake. To ride the shuttle, you will have to pay and make your reservation online in advance. Shuttle time slots fill up quickly and always run out. So don’t procrastinate!
Once you’re at Lake Louise, you can rent a canoe, do some stand-up paddle boarding, or just snap a few photos and take in the view. For me, while Lake Louise is a stunning and picturesque place, I thought it was also a bit overrated. The number of people can be a little overwhelming, and all the noise from the people makes it difficult to fully enjoy the surroundings.
As such, if you end up going a bit later in the day and have to deal with crowds, I recommend walking around the lake. The crowds thin out pretty quickly once you’re a few hundred feet away from the entrance and it takes only 15-20 minutes to reach the other side.
6. Lake Agnes Tea House
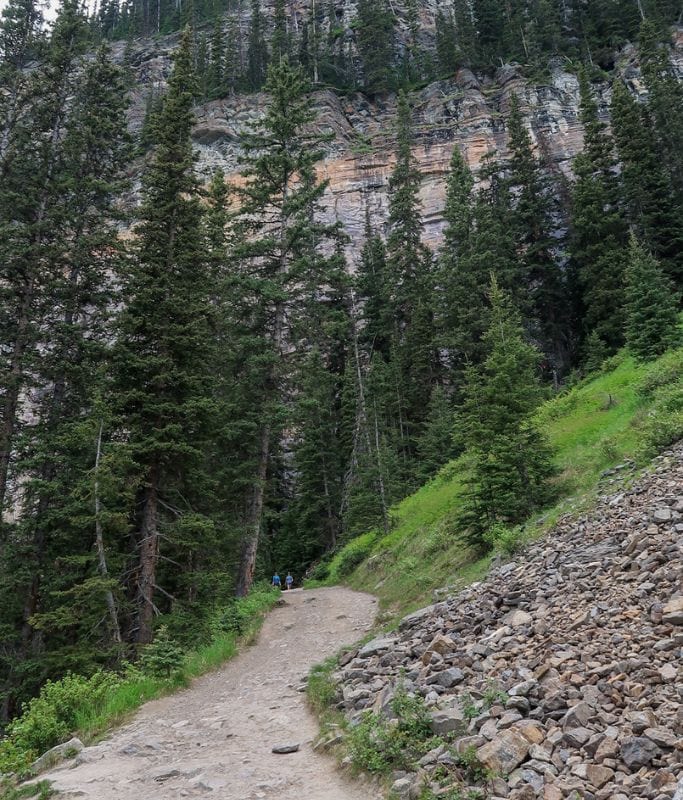
On the other side of the lake is also the trailhead for a hike that goes to Lake Agnes Tea House. The moderate hike to the tea house is 4.4 miles round trip, and it takes 1-2 hours one way. Once you reach the tea house, you can re-energize yourself with some delicious tea, soup, and mountain bars. Not to mention, the views from up top are unbeatable, and the staff is so friendly!
To thank them, ask the staff if you can help them take any garbage bags down. You can just tie the bag to the outside of your backpack, and it really helps them out. The workers normally have to hike out all the trash generated.
If you want to keep hiking past the tea house, you can extend the hike to about 9 miles round trip by visiting the Plain of Six Glaciers. This will give you one of the most extraordinary views of 6 different glaciers.
🥾 NOTE: Before hiking, make sure to check the trail conditions. If there has been heavy rainfall or snowfall, the trail may be unsafe or closed.
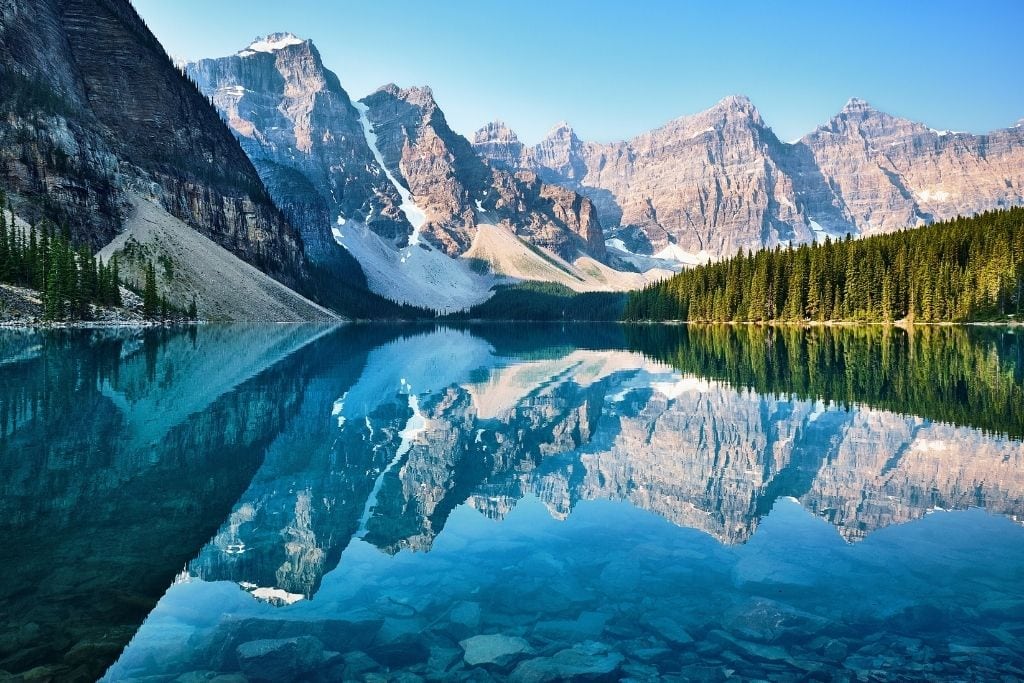
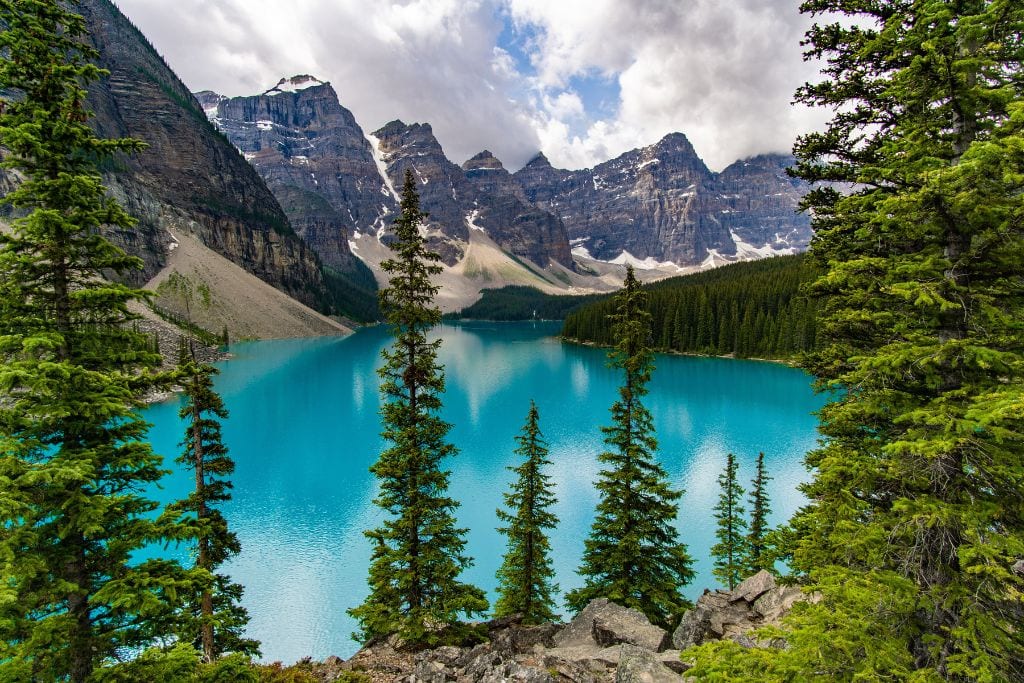
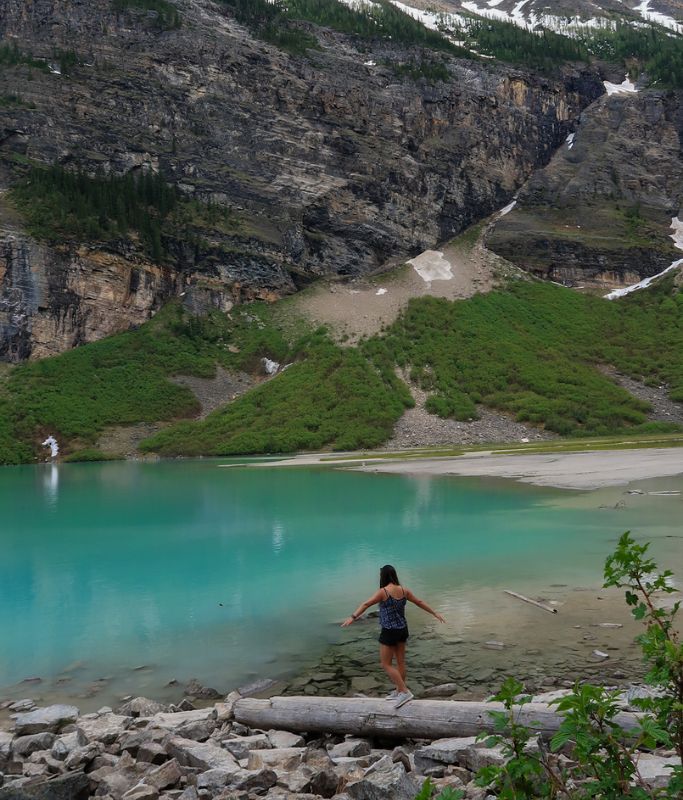
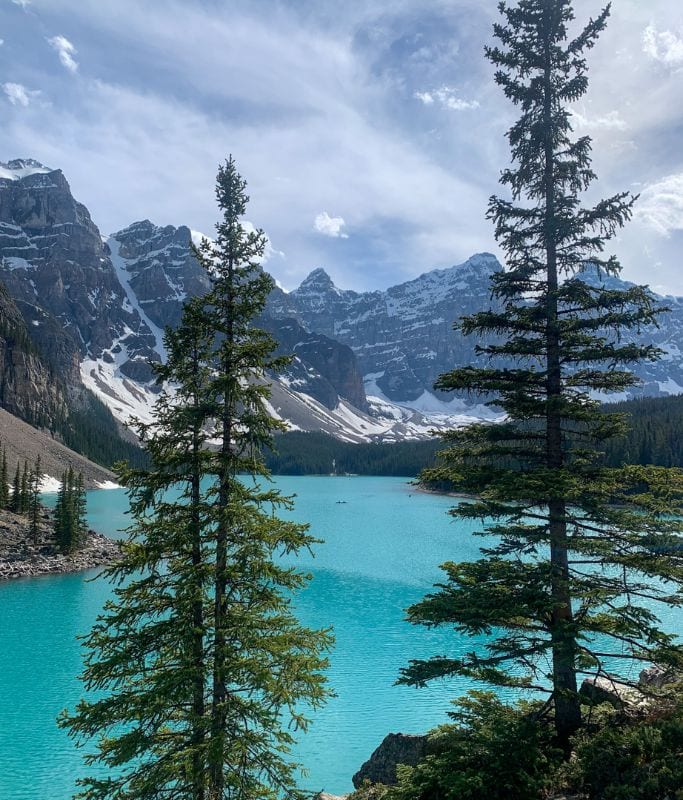
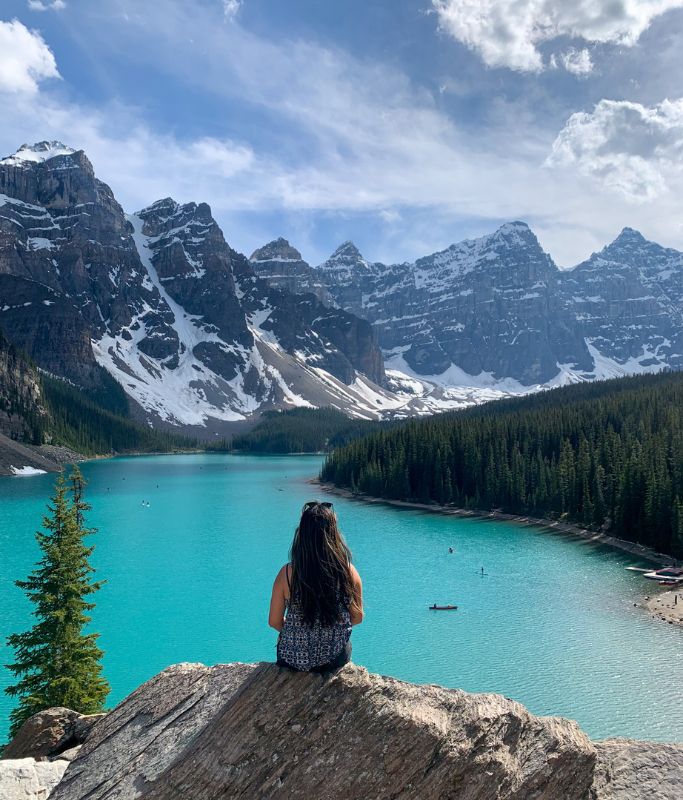
7. Moraine Lake
For the last stop of the time, it’s time to head to the other hyper-scenic lake… Moraine Lake! To get to Lake Moraine, you can ride the Parks Canada shuttle. The seat you booked to visit Lake Louise is also valid for going to Lake Moraine. Just wait in line at the designated area.
At Moraine Lake, you can go kayaking or canoeing on the water. And to capture the best pictures of Moraine Lake’s special turquoise color, I recommend climbing the Rockpile. The path to the Rockpile has a lot of steps, and the dirt can be pretty loose. So wear good shoes if you don’t want to be slipping and sliding around. From Moraine Lake, you can jump on the Parks Canada Shuttle to go back to Lake Louise ski resort.
Day 3: 4-Day Banff Itinerary
For day 3 of my 4-Day Banff Itinerary, we are headed for a scenic drive along Icefields Parkway. By now, you may have slightly less energy than you did in the beginning and your feet may hurt. As a result, I recommend saving the destinations further from the center of Banff for Day 3.
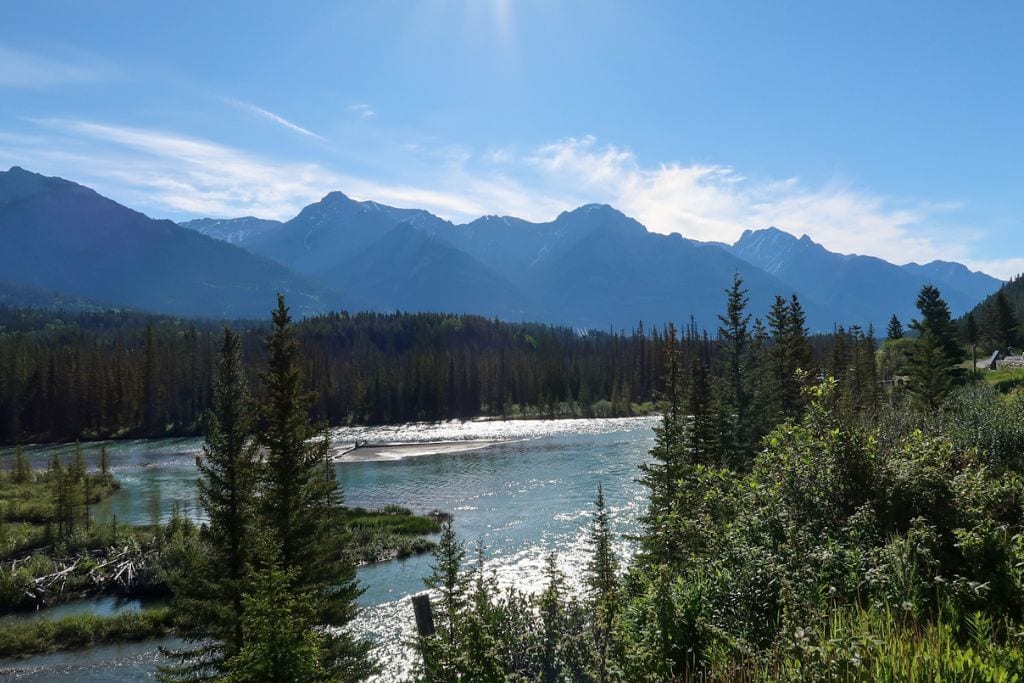
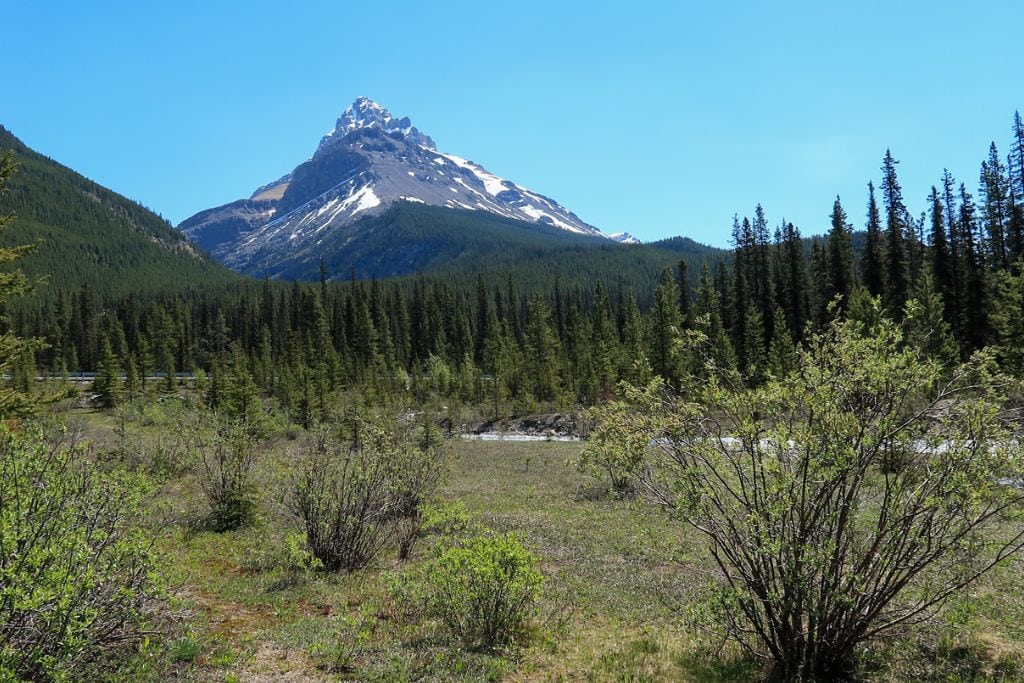
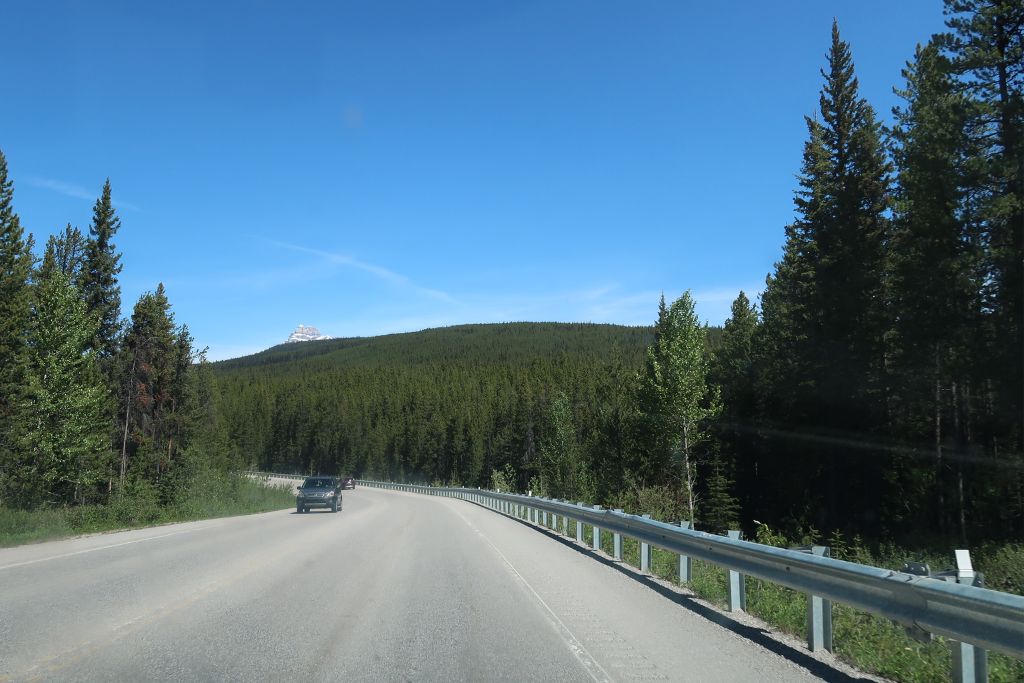
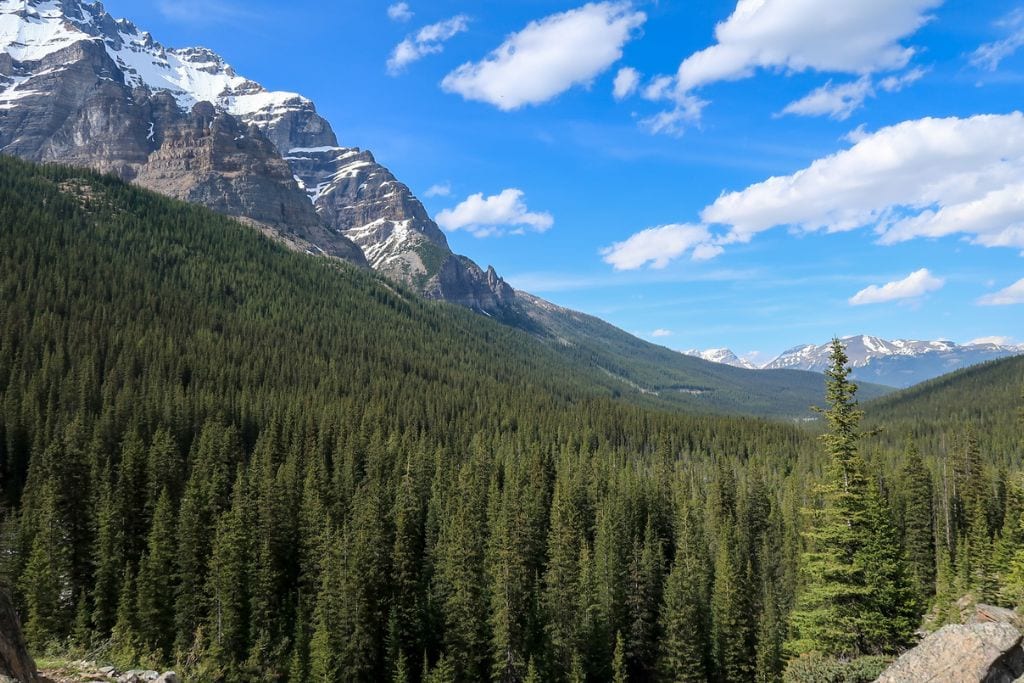
8. Icefields Parkway
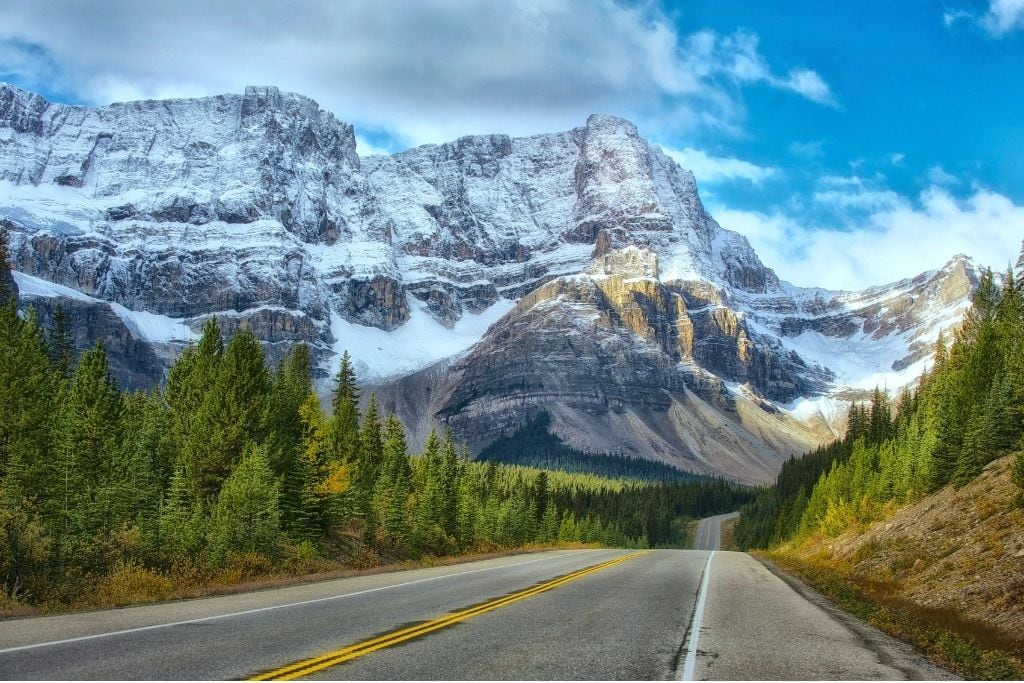
To start the day, I recommend driving along Icefields Parkway, which connects Banff National Park to Jasper National Park in the north. This parkway is unequivocally one of the most breathtaking stretches of road that I have driven on. On both sides of the road are majestic views of tightly packed evergreen trees, imposing snow-capped mountains, and glaciers springing up in the distance. Honestly, I don’t think anyone could be upset driving along this road.
At 230 km (143 miles) in length, I wouldn’t recommend driving the entire Icefields Parkway and back in a single day. Instead, I recommend driving about half of it and then turning around at one of the turnoffs. We turned around at Silverhorn Creek Campground since there was a river at the turnoff. Here, you can fill up your reusable water bottle with some fresh water from the river that comes directly from the glaciers, so it’s safe to drink and will leave you feeling refreshed. 😅
9. Peyto Lake
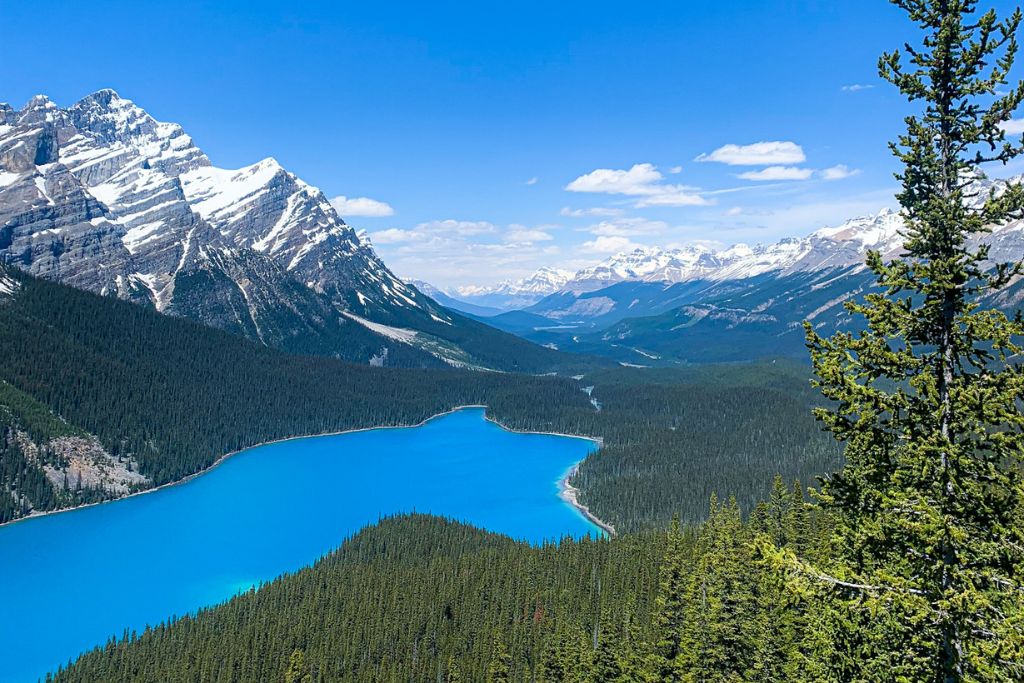
While driving back along Icefields Parkway towards Banff, hike to one of the viewpoints at Peyto Lake (pronounced Pee-toe). The lower viewpoint is only a short 20-minute hike away, along a well-paved path. Some sections of the path are steep, but aside from that, you don’t need to bring much with you. If the lower viewpoint is too crowded, consider hiking to the upper viewpoint 2.8 km away. From both viewpoints, you can admire Peyto Lake’s remarkable blue color.
Speaking of, the unique blue color that Peyto Lake, Moraine Lake, and Lake Louise are famously characterized by comes from the glacial water. Normally, glacial water is dirty, but as the water flows down to the lake, most of the larger pieces of rock are filtered or sink. Only fine particles of dirt remain suspended in the water. These fine particles ultimately scatter the blue and green light, giving these lakes their incredible color.
10. Bow Lake
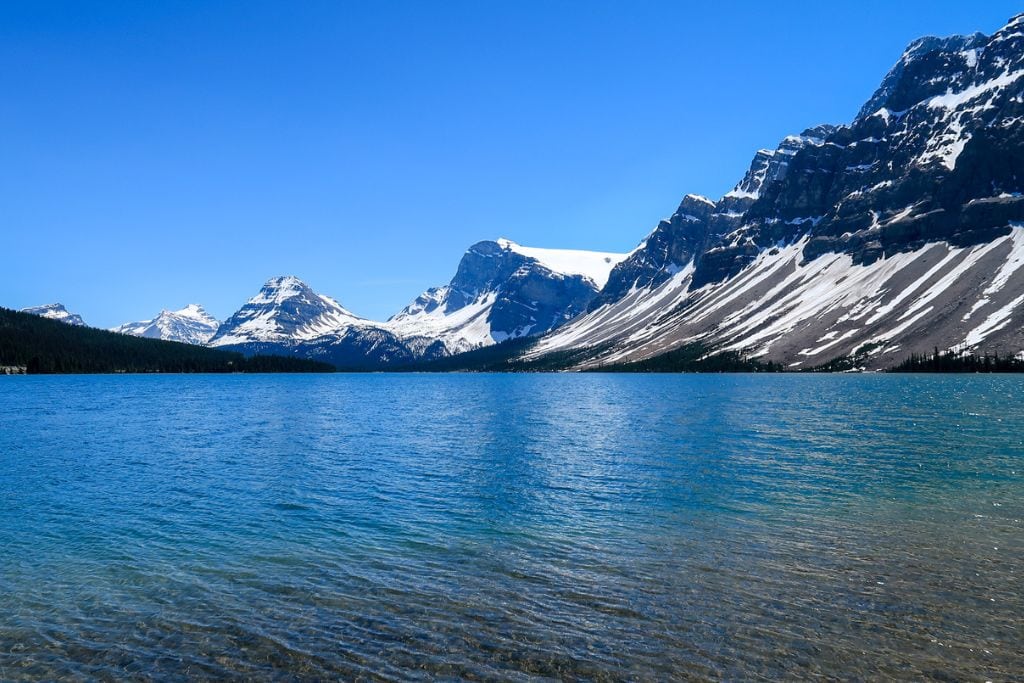
After Peyto Lake, hop back onto the road until you reach Bow Lake. I recommend taking the little dirt path that leads you into the medium-sized dirt parking lot instead of parking right next to the road. This will provide you with better access to walk along the shoreline, take pictures, and enjoy a snack or lunch on one of the logs.
As someone who values having peace while exploring nature, Bow Lake was one of my favorite places. Unlike Peyto Lake, this water is more clear blue, and you may even spot some fish. There were also hardly any crowds, and everything felt so serene. My friends and I even witnessed a small wedding take place along the shoreline! Congrats to Em and Fred!
11. Crowfoot Glacier Viewpoint
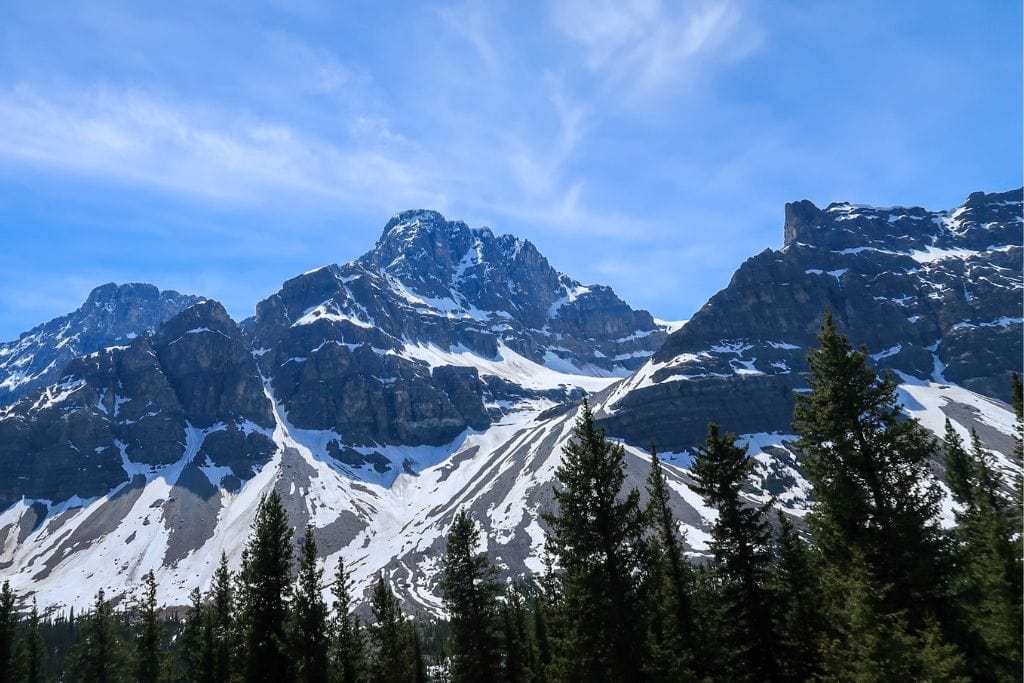
Less than a 2-minute drive from Bow Lake is Crowfoot Glacier Viewpoint. There’s a large parking lot on the side of the road that you can pull off into. Although there isn’t much to do, it’s worth stopping to appreciate the massive glacier up close.
12. Herbert Lake
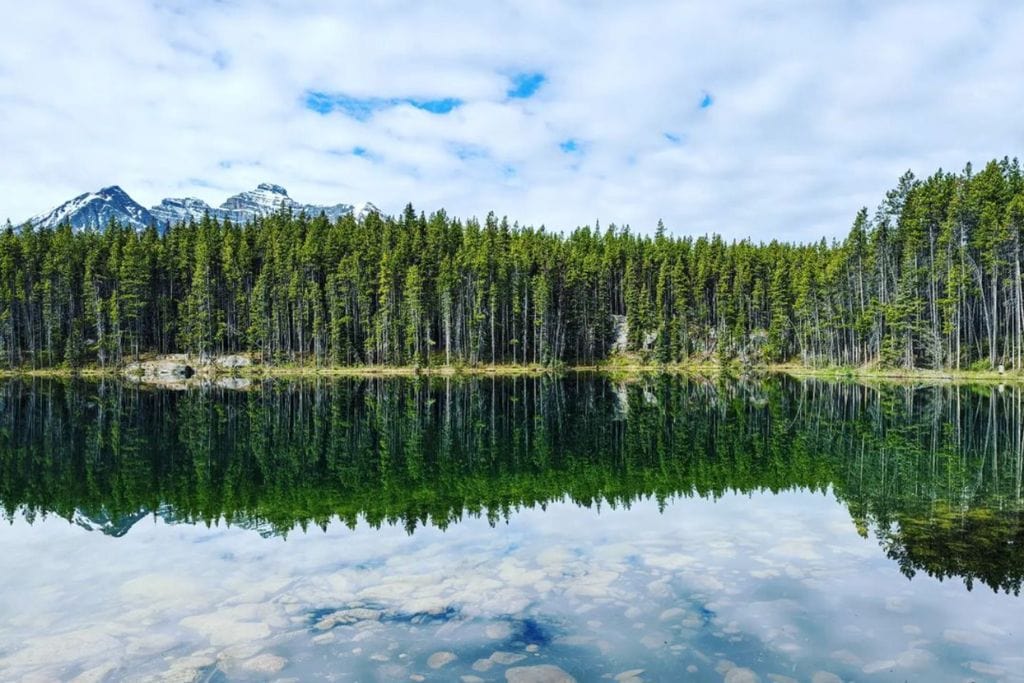
The last place I recommend stopping at on your way back to your accommodations is Herbert Lake. Located 20 minutes from Crowfoot Glacier Viewpoint on Icefields Parkway, the smaller secluded lake is considered a bit more of a hidden gem.
You likely won’t encounter any crowds, and there is a sense of tranquility around the entire place. In the morning, or on days when it isn’t windy, the lake is known to provide crisp reflections of the nearby trees and mountains. There’s even a makeshift diving board on one of the rocks. Therefore, if you happen to visit when it’s a bit warmer, you can cool off by swimming around in the lake.
Day 4: 4-Day Banff Itinerary
For the final day of my 4-Day Banff Itinerary, I recommend embarking on an incredible hike to the top of Sulphur Mountain. This will allow you to finish the trip off with the most amazing panoramic views of the Canadian Rockies!
13. Sulphur Mountain
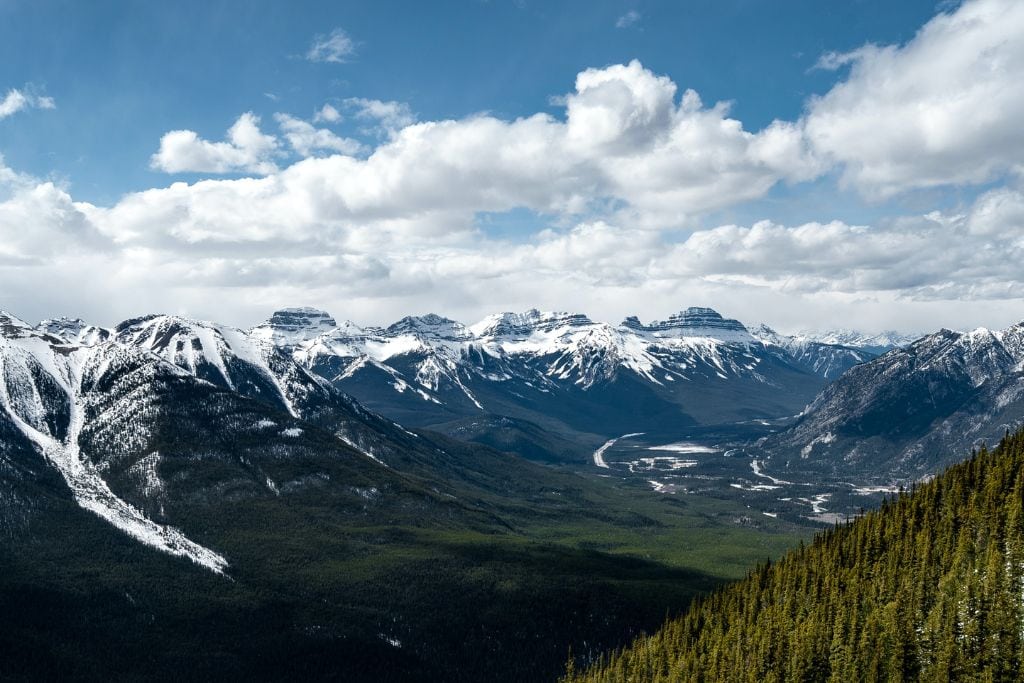
For those who don’t know, Sulphur Mountain is considered one of the best scenic lookout points in the Rockies. As a result, hiking to the top is one of the most popular things to do in Banff National Park since the mountain is located just 7 km from downtown Banff.
Roundtrip, the hike is 6.8 miles (11 km), with an elevation gain of 2,480 feet (756 m), and contains lots of switchbacks. I won’t lie — this route is challenging. On average, it takes about 4.5 hours to complete. That said, even if you’re an inexperienced hiker and thinking, “Nope. Not for me…,” I urge you to reconsider. The hike is a long one, but quite doable. You just might need to take breaks more frequently, and there’s absolutely nothing wrong with that.
Plus, when you reach the top, you’ll be so proud of yourself! The journey/struggle (because let’s face it…anytime we hike uphill for more than 5 minutes, we immediately start re-evaluating our choices) will only make the breathtaking views of Bow Valley even more worth it!
🏔 NOTE: Be sure to bring plenty of water, wear comfortable shoes, snacks for extra fuel, and a jacket as it gets colder the higher up you go!
14. Banff Gondola
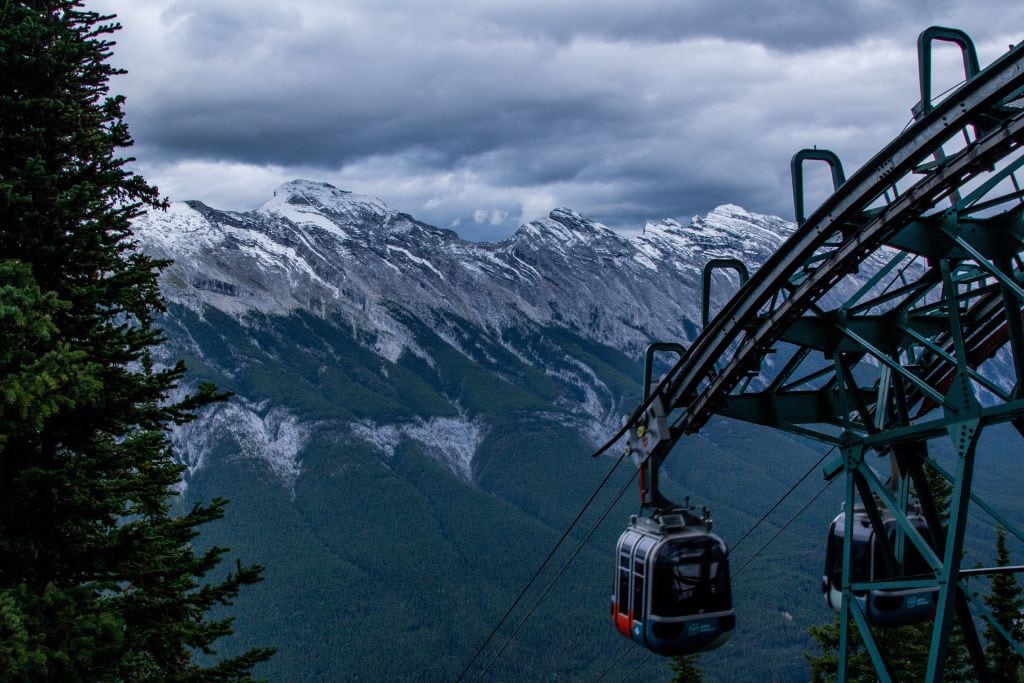
Of course, if you decide not to hike to the top of Sulphur Mountain, you can still enjoy the sweeping panoramic views by taking the Banff Gondola. One way, the gondola takes about 8 minutes and allows you to soar above the treetops at a height of about 2,292 feet. You’ll arrive practically at the top of the Sulphur Mountain Trail. From there, you’ll walk across a wooden boardwalk and up some stairs that will take you to the actual top of the mountain, where all the best views are!
On top of the mountain, you’ll find a quite pristine and fancy summit building. Within it, there are restaurants, interactive museums, and even a little theatre. However, the best part in my opinion is the 360° rooftop observation deck! So if aren’t up for hiking to the top, you can always take the Banff Gondola! Either way, it’s well worth the trek or the price of the Gondola to soak up the magnificent views of Bow Valley!
✅ Click to purchase your roundtrip ticket on the Banff Gondola
Getting Around Banff
Banff by Car
By far the easiest and best way to get around Banff is by car. This will give you the most freedom in creating your perfect Banff itinerary and accessing the more remote locations.
🚗 If you’re flying into Calgary International Airport, you can pick up your rental car directly from the airport! Book your rental car as soon as possible since inventory is limited!
Banff by Bike
If you don’t want to travel by car, it’s possible to access a lot of the spots by bike. During the shoulder season, Bow Valley Parkway (Highway 1A) is often closed to regular traffic. This makes the stretch of road perfect for a pleasant day cycling all over Banff!
Those interested can check out a few shops in Banff town that rent out both regular mountain and road bikes as well as e-bikes. However, navigating Banff safely while riding a bike can be a bit of a challenge. Thus, I recommend taking this highly-rated guided e-bike tour around Banff if you’re looking to explore the area completely al fresco!
⭐️ RATING: 5 out of 5 – 90+ 5-star reviews! | ⏳LENGTH OF TOUR: 4 hours
This small group e-bike tour includes:
- Professional Guide to help you explore Banff on an e-bike
- Day Hike through Johnston Canyon to Lower Falls
- Biking through the serene forest on Legacy Trail
- Cycling along Bow Valley Parkway
- Seeing Vermilion Lakes
- Shuttle back to the meeting spot
“Our guide, Michelle, was outstanding. She was informative, extremely friendly, helpful and safety conscious. One of the best tour guides I’ve ever had. The places we went were beautiful. Everything was high quality. It was a really fun activity. I highly recommend this tour.”
Carol (See more reviews)
✅ Check rates & availability for this excellent e-bike tour through Banff
Banff by Bus
If you would rather just hop on and off various buses, Banff has a hop-on, hop-off bus that allows you to explore at your own pace. You’ll want to buy tickets in advance to guarantee your seat!
Where to Stay in Banff Alberta
There are so many different places to stay in Banff, from lodges to hotels to bed and breakfasts. Depending on your budget and timing, you can expect to spend $100 a night to upwards of $1000 per night. Regardless of your budget, the most important thing to take away is to book as soon as you possibly can. And to help you out, here are my recommendations for where to stay in Banff, Alberta.
Budget-Friendly Housing
- Banff International Hostel — If you are a student or young adult trying to save as much money as possible, check out the Banff International Hostel as you won’t find a cheaper place to stay unless you plan on car camping…
- A local’s place — You can always check out VRBO for resident housing that fits your exact needs.
Medium-High Priced Hotels
- Elk + Avenue Hotel — ⭐️ 9 / 10
Located on Banff Avenue, this hotel is within a 5-minute walking distance of everything downtown. The rooms are clean, well-stocked, and kept up-to-date. Plus, if you get hungry, there is a restaurant and bar attached to the hotel. They provide modest services, but considering the price and location of the hotel, the Elk+Avenue Hotel is a solid affordable option.
✅ Check rates & availability at Elk + Avenue Hotel
- The Rimrock Resort Hotel – ⭐️ 9.4 / 10
On the higher end, but not quite the price of staying at a Fairmont Hotel is the Rimrock Resort Hotel. This 4-star hotel is located deep in the Canadian Rockies and offers a marvelous view just from your hotel room. The hotel includes 2 restaurants with excellent food, several fitness areas, an indoor pool, and a sauna. It’s also near a few tourist attractions. So, if you want an almost fairytale experience high up in the mountains, this is the hotel for you.
✅ Check rates & availability at Rimrock Resort Hotel
Luxury Stays
- Fairmont Chateau Lake Louise — ⭐️ 8.4 / 10
If you want the full luxury experience, then the Fairmont Chateau Lake Louise has it. Located right on Lake Louise, the luxury mountain resorts allow you to skip the transportation hassle and simply wake up to the breathtaking views of Lake Louise. The resort offers all kinds of services and amenities to its guests. For example, you can embark on a guided mountain tour, they have an in-house rental shop, indoor pool, spa, and so much more.
✅ Check rates & availability at Fairmont Chateau Lake Louise
- Fairmont Springs Banff Hotel — ⭐️ 8.9 / 10
Right in the heart of Banff is the iconic Fairmont Springs Banff Hotel. It sits right next to Bow River and offers a superb view of the surrounding green valley and Mount Rundle. The luxury hotel has been open for over 130 years and has an insane 745 guest rooms. Some of the amenities it provides include high-end fitness centers, pools, tennis courts, access to the Championship golf course, a wide gamut of organized activities and tours, and more. If this doesn’t scream luxury, I don’t know what does.
✅ Check rates & availability at Fairmont Springs Banff Hotel
Housing Outside of Banff
If you are looking for more affordable housing options that are less crowded with tourists, consider finding lodging in the nearby town of Canmore. This city is a quick 20-minute drive from Banff and is known to have more of a local vibe. Feel free to use the interactive map below to help view hotels and rentals available in the area. And if you enter your specific travel dates, you’ll get an even more accurate picture of what is currently available.
4-Day Banff Itinerary: What to Pack
Aside from the normal items to bring while traveling, you will want to pack a few extra things to ensure you are prepared for your trip to Banff.
🛂 Park Pass – As mentioned earlier, you’ll need to purchase a park pass to enter Banff. If you are traveling in a car, don’t forget to put the park pass on your vehicle dashboard.
🧥 Jacket – Even if you are visiting in the summertime, pack a jacket or some warm layers. It can get pretty warm during the day, but the mornings are brisk. Plus, temperatures on the mountain trails tend to be colder than the temperatures in town.
🥾 Comfortable Hiking Shoes – Most of the scenic spots require some hiking to get to, and the trails can be a bit slippery, especially if there has been recent rainfall. Do yourself a favor and wear hiking shoes with a good amount of traction.
🌞 Sunscreen/Sunglasses/Hat – The sun is very intense in Banff because the air is thinner at higher elevations, so protect yourself with sunscreen. I forgot sunscreen the first day I was in Banff, and my lips ended up fairly sunburnt. 😢 Similarly, I recommend sunglasses because the sunlight reflected from the lakewater can damage your eyes after a while.
🐻 Bear Spray – If plan to do a hike, especially one that isn’t as popular, it is highly recommended to pack some bear spray. For anyone hopping on a plane, you will have to buy the spray locally as these aerosols are not allowed on planes. Please educate yourself on how to use the bear spray and make sure it is easily accessible. If you encounter a bear and find yourself in a dangerous situation, you don’t want to waste precious time fumbling around for your spray.
Tips for Visiting Banff
A 4-Day Banff Itinerary isn’t complete without giving you some tips on how to save money, avoid crowds, and stay safe!
Make a Reservation in Advance
Whether you are booking a spot on the bus to Lake Louise or your accommodations for the trip, make your reservations as soon as possible. In the age of social media and people being obsessed with visiting the most picture-perfect locations, Banff receives more and more visitors each year. As a result, hotels and lodges fill up quickly and prices go up, especially when peak season starts to roll around. Save yourself some money by not waiting until the last minute to make your reservation.
Go During the Week
If you aren’t keen on dealing with massive tourist crowds, try to go during the week. As someone who went both on the weekend and during the week, there is a fairly noticeable difference in terms of the size of the crowds. That’s not to say that there won’t be any crowds during the week, but the roads are less congested, and parking is a bit easier.
Wake up Extra Early
On a similar note, if you want to get your perfect picture without a bunch of people in the background, wake up extra early. I am not talking about waking up at 7 AM and heading out the door at 8 AM. I mean arriving at the popular tourist spots, such as Lake Louisa and Lake Moraine by 6 am. Sleep is for the weak and we can sleep when we are dead right? 🥲 The bright side is that you can watch some of the most gorgeous sunrises as the morning light crests the mountains and brings everything to life.
Bring Food and Save Money
As one of the most visited tourist destinations, the food in Banff is notoriously expensive. To give you perspective, I decided to eat dinner in Banff town with some friends and internally cried as I paid $25 CAD for a 10″ pizza. Save yourself some money by stopping at the local grocery store, like IGA or Safeway. Be sure to pack out food remnants and trash if you stop to eat a snack while on the trail. You don’t want to attract any wildlife.
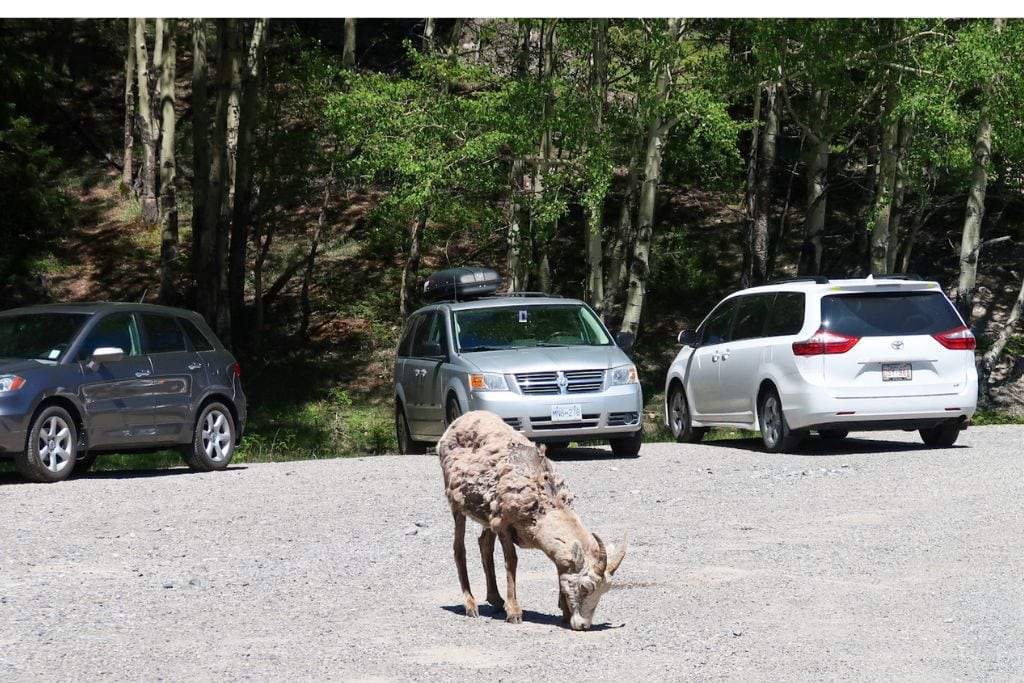
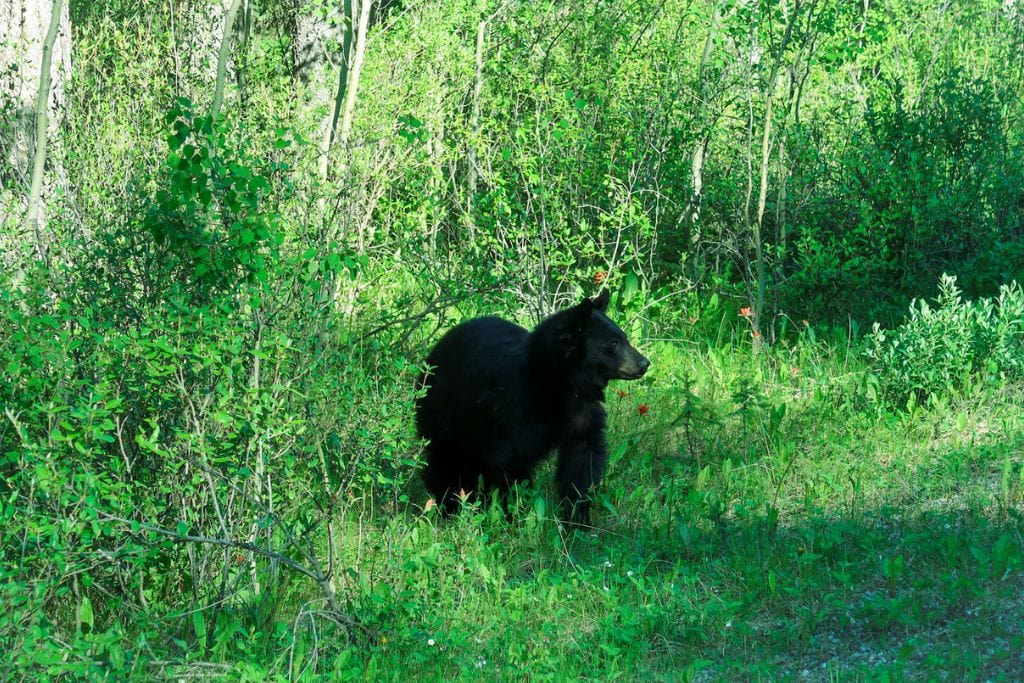
Respect the Wildlife
With Banff’s thousands of miles of dense forests and sweeping mountains, it means all kinds of wildlife. People often encounter black bears, moose, deer, chipmunks, goats, and so much more. I know it can be tempting to step out of your car, feed them, or approach them to take a picture, but for your sake and the animals’…don’t.
Remember that the animals are wild and their behavior can therefore be unpredictable. Don’t feed them human food and leave no trace by throwing out any trash you produce. We want to respect the homes of these beautiful creatures.
Visiting Banff: FAQ
To be honest, Banff is a tourist and local hotspot almost year-round. There isn’t a true off-season, but here’s what to keep in mind. The peak season is considered from June to August. During this time, there are milder temperatures, less rainfall, and days when the sun is out until 10 PM. And since rainfall tends to muddy the brilliant blue color of the lakes, these summer months are the best time for capturing pictures, canoeing, hopping on a boat tour, and embarking on a hike through the evergreen trees. You may even see some wildlife, including deer, goats, or bears passing by!
Another popular time to visit is during the winter season (October – April). With Banff’s abundant snowfall, avid skiers, snowboarders, and alpinists flock to enjoy the three ski resorts, and the national park transforms into a winter wonderland with snow blanketing the entire area.
Now, if you want to avoid the heavy crowds, I recommend passing through during the shoulder season — May and September. Beware though, the weather tends to be fickle. You may get caught in a heavy rainstorm or snowstorm, but hey, what’s traveling without a little adventure?! 😄
Depending on what you want, you can honestly spend a day or weeks in Banff National Park. If you’re on a tight schedule, you can fairly comfortably visit the most popular tourist spots within a day. However, if you want to see some of the less frequented places or do a bit of light hiking, I recommend spending at least three days. This will allow you to take the time to truly appreciate the stunning surroundings without feeling in a rush to tick off everything.
Wrap-Up: 4-Day Banff Itinerary (2024)
Every year, Banff National Park attracts millions of photographers, nature lovers, locals, and tourists worldwide. With so many must-see destinations, it can be hard to plan your perfect itinerary. Hopefully, with my 4-day Banff itinerary, you can create your dream trip that suits your traveling style!
Recap
Here is a list to recap the 12 beautiful places you should visit on your trip to Banff.
- Johnston Canyon – The famous limestone canyon with hikes to several waterfalls and mineral pools.
- Lake Minnewanka – A massive lake that is less crowded than Lake Louise and Moraine Lake.
- Banff Town – The famous resort town with lots of restaurants, bars, hotels, lodges, and souvenir shops.
- Bow Falls Viewpoint – A scenic spot right behind the Fairmont Springs Banff Hotel to look at Bow Falls.
- Lake Louise – One of the two most popular lakes in Banff
- Lake Agnes Tea House – Quaint Teahouse, with awesome snacks, located along a 4.4-mile trail
- Moraine Lake – The other of the two most popular lakes in Banff.
- Icefields Parkway – An incredibly scenic road connecting Banff National Park to Jasper National Park.
- Peyto Lake – A lake with an unbelievable blue color and two great viewpoints
- Bow Lake – A magnificent, less crowded lake located along Icefields Parkway
- Crowfoot Glacier Viewpoint – Get up close to a massive glacier located 2 minutes from Bow Lake.
- Herbert Lake – A secluded lake that is less frequented and a bit of a hidden gem.
- Sulphur Mountain – Ascend to the top for the most amazing views of Bow Valley.
- Banff Gondola – Soar more than 2,000 feet above the trees surrounding Sulfur Mountain!
If you made it this far, thanks for reading my ultimate 4-Day Banff Itinerary. I wish you the absolute best time on your adventure through Banff National Park!

Learn More About Canada
- 🍁 Montreal: Thinking of visiting the lovely city of Montreal? Learn about my specific trip costs and what you might spend visiting Montreal here. Or, check out my 5-day Montreal itinerary.
- 🏎️ F1 Fans: Want to attend the Canadian Grand Prix? Read my ultimate guide for the best possible race experience and mistakes to avoid!